
|
Use the Windows Explorer to locate the images.zip
file that was downloaded earlier.
Double click on images.zip to
decompress the files in the zip archive. You will need to have an unzip utility such
as pkzip or WinZip installed on your computer.
Click  to get WinZip if necessary.
|

|
- Install the screen saver by double clicking the setup.exe
file that was just extracted.
|
 |
- Click Continue when the dialog box stating
that the program will initialize the screen saver on your system appears.
|
 |
- Click OK to begin configuring the Screen
Saver.
|

|
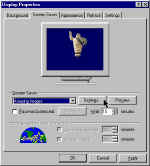
The Display Control Panel
will pop up with the Screen Saver tab already selected.
Set the amount of time to wait for the screen
saver to come on to the desired value.
Click on the Settings button
in the middle of the panel (do not click on the Settings tab at the top of the panel).
|
 |
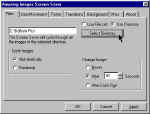
The Files tab should appear
first. If not then click on it.
Set the Change Image choice
to your desired value.
Click on the Use Directory
button.
Click on the Select Directory
button and select the folder where you saved the Balloon Images during the Download step.
|
 |
|
|
 |
|
|
 |
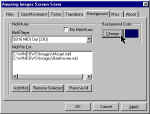
Click on the Background tab.
Click Change to set the
background color. (You have to set the screen background to the same color as the
background in the images so that you don't see a rectangular box moving around the
screen).
|
 |
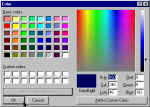
Click on the Define Custom Colors
button.
Set the Red, Green, and Blue boxes to 0, 0,
and 102 respectively.
Click OK to close the color
dialog box.
Click OK to close the Amazing
Images Screen Saver dialog box.
Click OK to close the Display
Properties dialog box.
|
 |
That should complete the installation and configuration. Any time you wish to
make changes in the way the screen saver is configured simply double click the Display
icon
in the Control Panel. Enjoy using the Amazing Hot Air
Balloon Screen Saver. |